echoVideo for Students: How to Submit a video assignment
| Global: | UNE myLearn |
| Site: | Learning Online at UNE |
| Book: | echoVideo for Students: How to Submit a video assignment |
| Printed by: | Guest user |
| Date: | Wednesday, 14 January 2026, 10:57 PM |
Description
If you require assistance regarding EchoVideo and it is not captured in these available guides, please contact your Unit Coordinator.
1. Introduction
Some assessment tasks require you to submit a video for the assessment. This could be a video you create with a camera, on your phone or it could be a recording on your computer created as a screen recording. To facilitate this UNE provides all students with access to Echovideo Library includes a space where you can upload your videos and a desktop recording tool, to allow you to create screen recordings.This guide provides information and how-to instructions about using these tools to complete your video assessment.
What is echoVideo Library?
Your echoVideo Library is a space where you can upload and manage your video content. When it has uploaded and processed you can check your video is correct before you complete your submission. The editor that displays in many places in myLearn including video assignment submission pages allows you to select a video from your echoVideo library and display it directly there. This is what you will do for your submission. Then your video will then display there and can be viewed in the assignment page in a similar way to a Youtube video.
echoVideo Library
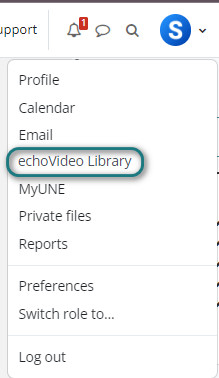
Click your name in the top right on any screen in myLearn and from the drop down menu, Select Echo360 library (Note: we are currently transitioning to echoVideo library... so watch this space!)
Further Resources
2. Video assessment - how to submit
For most video-based assignments, submitting your video will be a two step process:- Upload media to echoVideo Library
- Embed and Submit
This process assumes you already have your video ready and stored on your device.
Video Instructions for how to Upload and submit
- Step 1: Upload media - 00.20/2:30
- Step 2: Embed media into the assignment - 01:20/2:30
Written Instructions for How to submit an echoVideo assessment
- Upload media to echoVideo Library
- Embed and Submit
Step 1: Upload media to echoVideo Library:
Go to your Assignment and click the Add submission button
![]()
You should have an Online Text editor to embed your video.
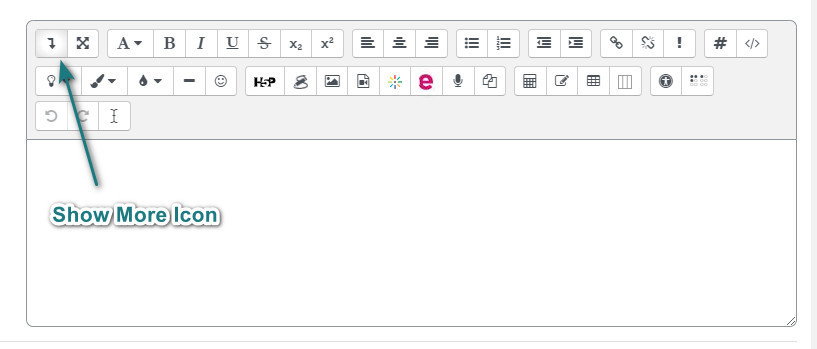
Click on the Expand tool (the first tool) of the Online Text Editor toolbar to expand the toolbars
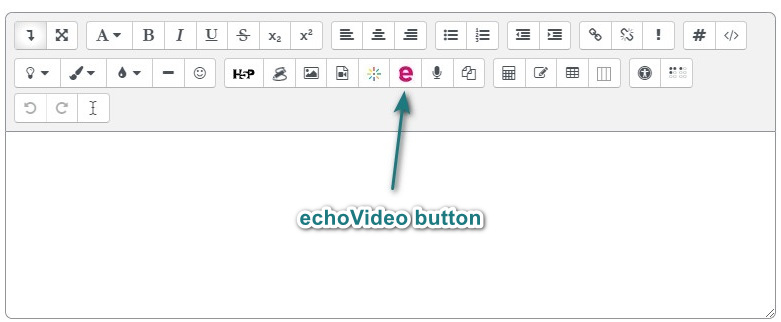
Click on the echoVideo Embed tool on the second toolbar
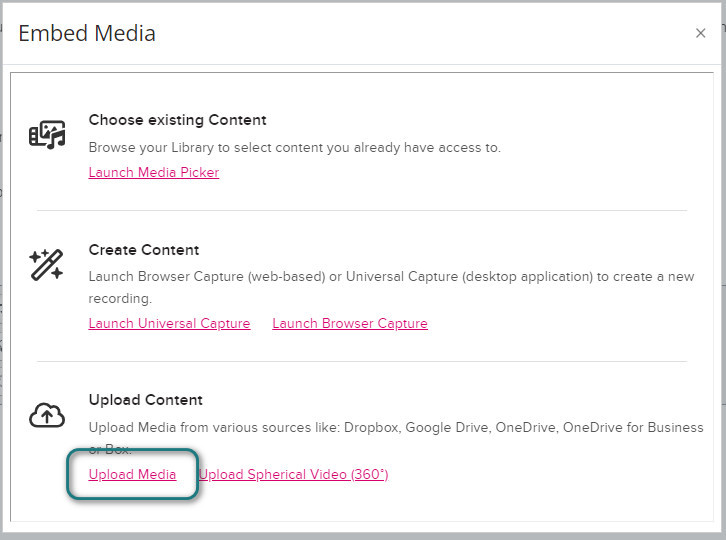
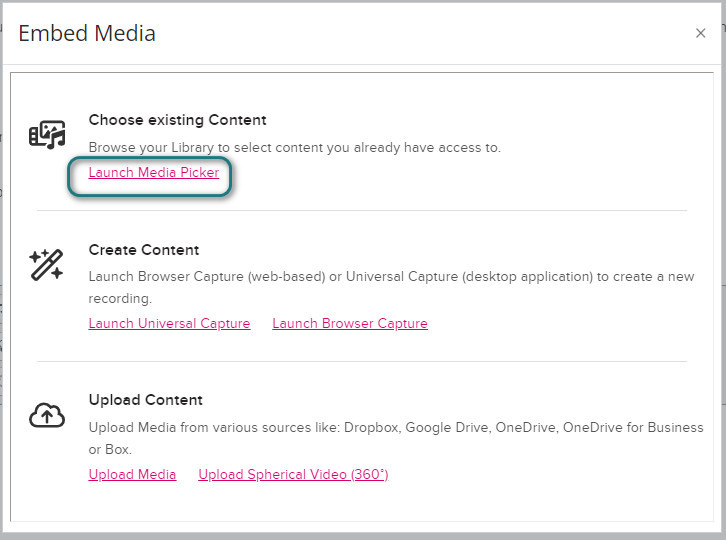
In the Embed Media popup, under "Upload Content" select Upload Media to upload your media to your Echo360 Library
Drag and Drop your file onto the upload panel -or-
click the add button ![]() to select the file from your device
to select the file from your device
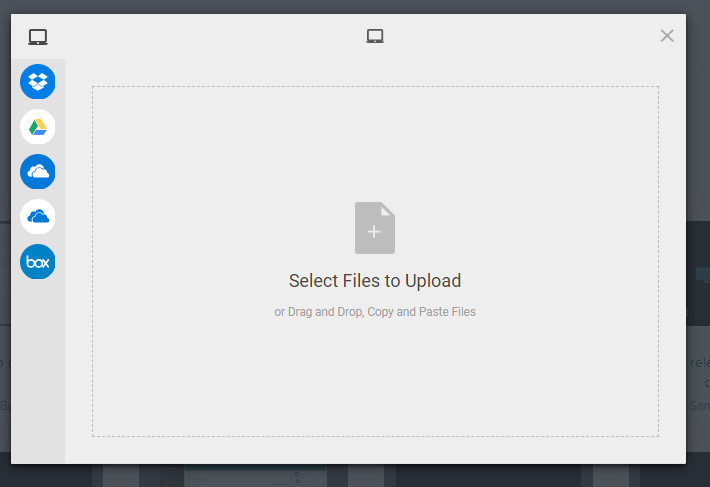
Click the Upload button. When complete, return to the Embed Media section for Step 2.
Step 2 Embed and Submit:
You are now back in the Embed Media popup. Under Choose existing Content select Launch Media Picker
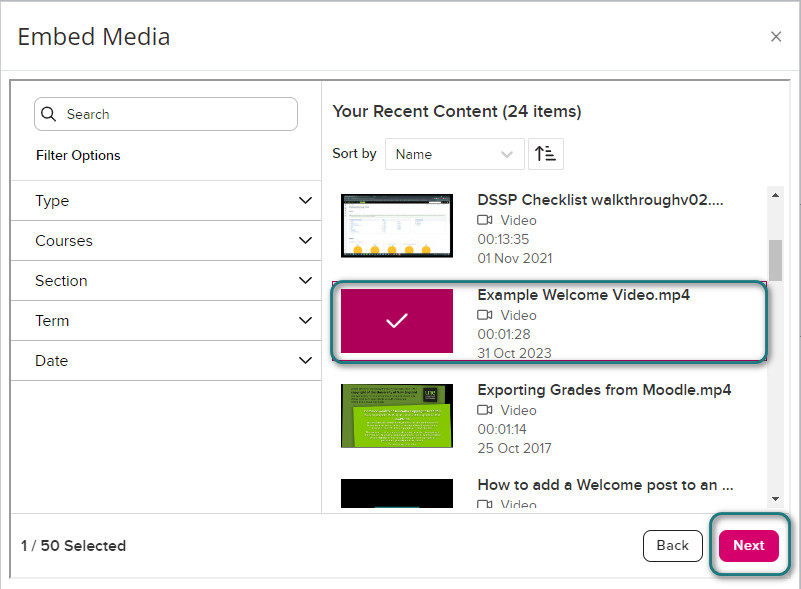
Select your video and click the Next button
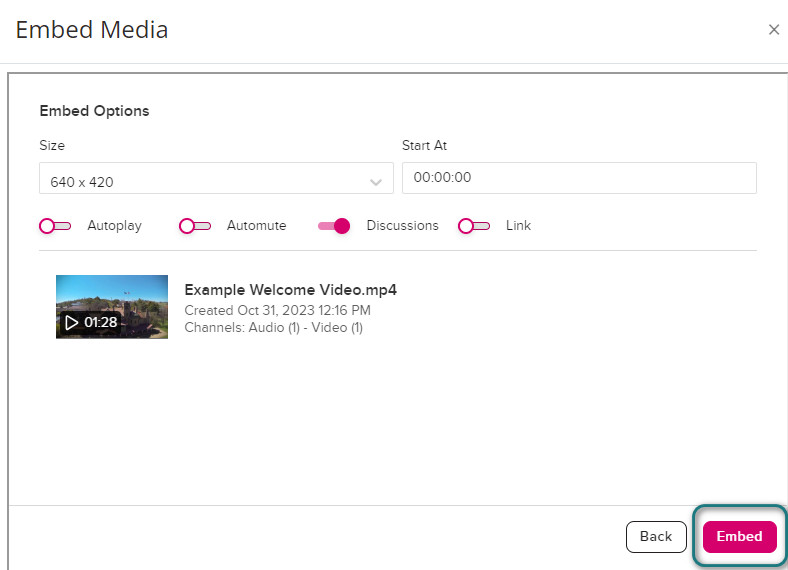
On the Embed Options page of the popup, accept the defaults and click the Embed button
You now have an Embed Link in the Online Text Editor
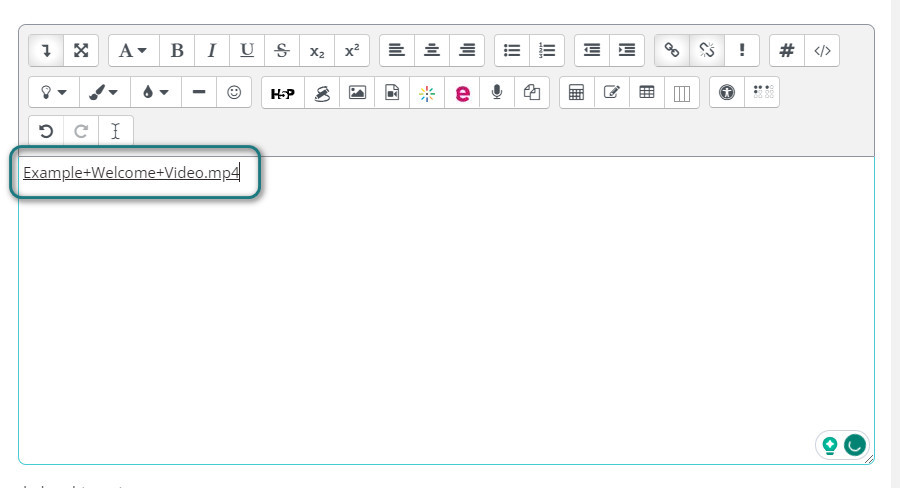
Click the Save Changes button below the editor

Click the Submit Assignment button

Tick the checkbox to agree to the declaration and Click Continue to complete the submission
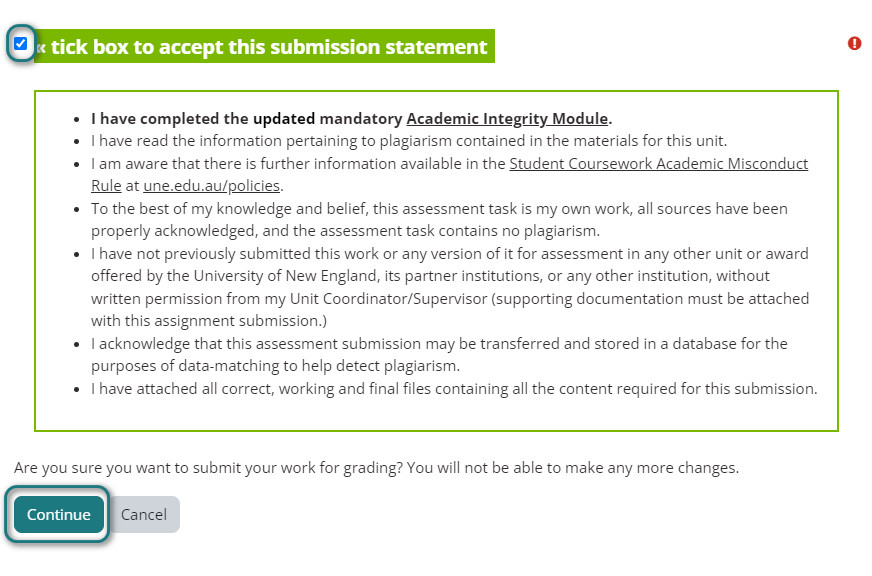
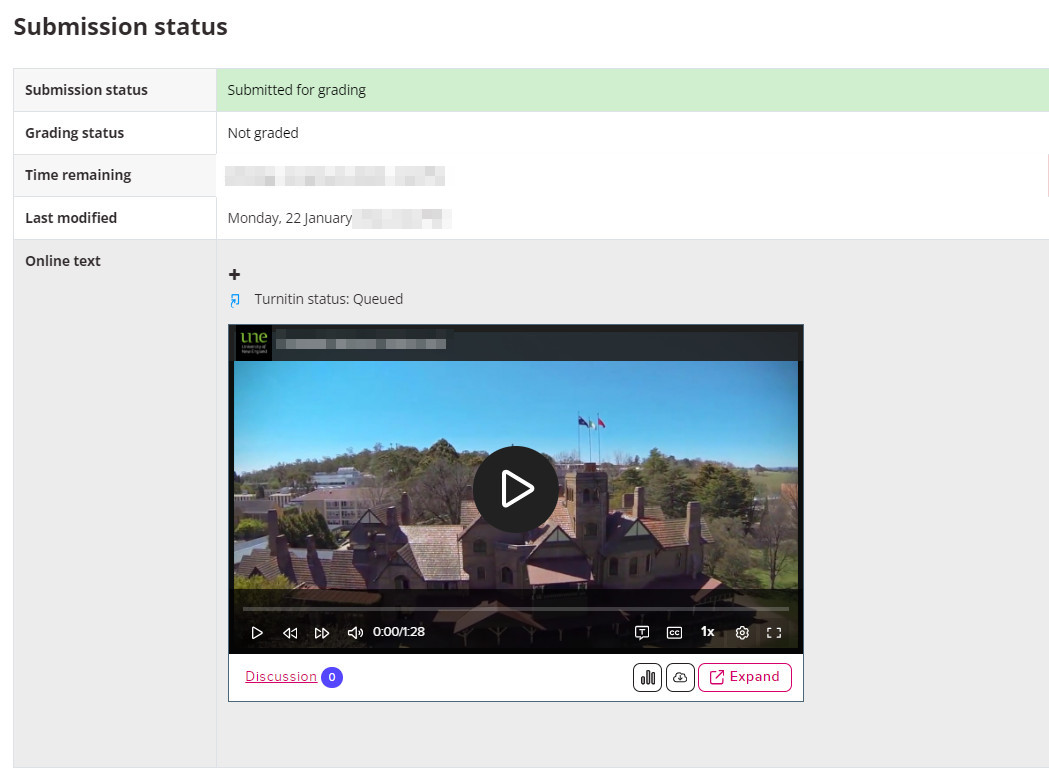
Once completed, the Submission will be processed and ready for marking by the marking team in your unit.
3. Universal Capture
The reason you may need to install Universal Capture (UC) is to record an activity for an assessment task. You may need to use this software for such activities as:- Presentations: Use it for recording slideshows, screen sharing, or both.
- Video Recordings: Capture tutorials, demonstrations, or other types of content effortlessly.
- Interviews: Utilise multiple participant support, recording modes, and specific interview settings.
- Language Practice: Enhance language learning through dedicated features.
- Role-Playing: Facilitate role-playing scenarios seamlessly.
- Reflective Practice: Leverage the software for effective reflective exercises or assessments.
Make sure your device meets Universal Capture's system requirements before installation. For instructions to guide you, you can watch the video below or follow the written instructions here.
Watch - how to install Universal Catpture
The video will demonstrate on how to download and install the app onto your computer.
Downloading onto a MAC
On a MAC, make sure you follow these instructions for allow access to inputs.Watch - how to use UC
The video will show you how to use the basic tools of universal capture.Please note - the video is based on a PC user, however the interface for MAC and PC is closely aligned.
Working Offline using UC
If you need to save on bandwidth or are not ready for a recording to be uploaded to your echoVideo Library, follow these instructions, which come from echoVideo website.4. Browser Capture
EchoVideo can provide web or "browser-based" capture, a simplified method of creating a recording using any computer, using any of our supported browsers. While Universal Capture software is a lot more feature-rich, the In-Browser recording feature can be run on any computer that supports browser use.
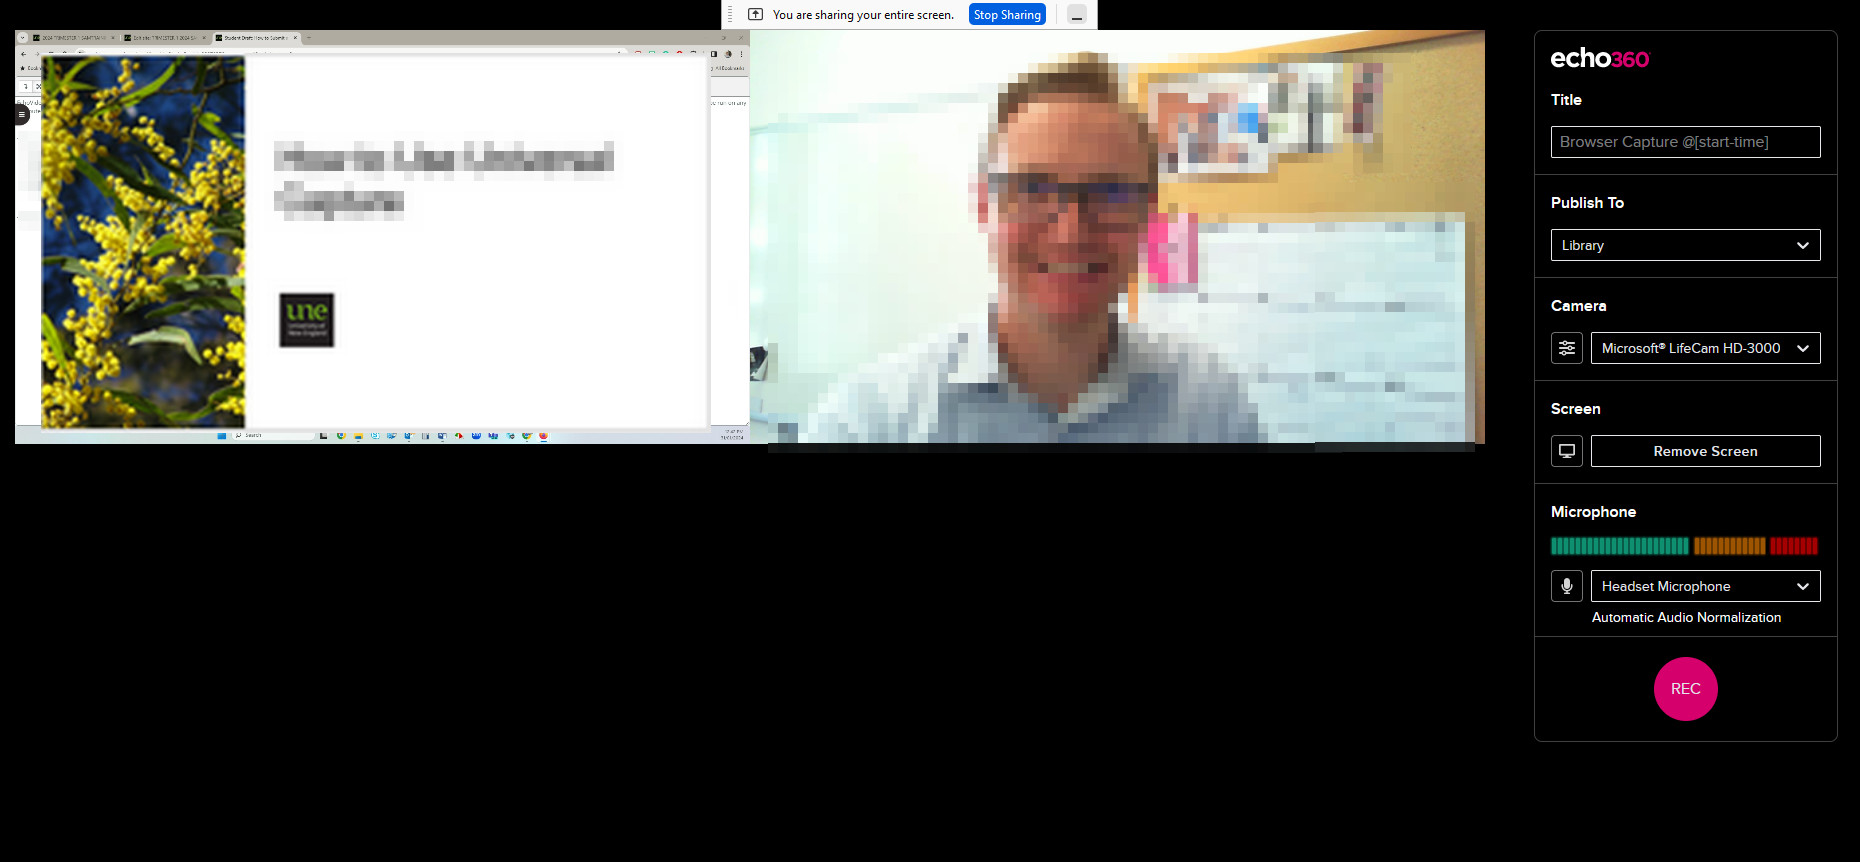
https://app.echo360.net.au/browser-capture/
The requirements for using in-browser capture are:
- EchoVideo browser-based capture must be enabled from your EchoVideo Library
- You must be online and be in EchoVideo.
- You must allow access to your computer's camera and microphone when requested.
- You must NOT be using an Incognito window. While in-browser capture may work in incognito mode, if other tabs or browsers are also using it, there may be conflicts that EchoVideo cannot provide warnings for through an incognito browser window.
- Mobile Devices and Tablets are not supported. You must use a desktop or laptop computer.
5. File too big to upload
File too big to upload
Submitting a video assignment can be stressful when you have a big video file and slow internet to upload it through. Watch this video to get a quick start guide to make your video smaller using VLC Media Player so the upload does not fail.
Mac
PC
Text instructions
- Download and install VLC Media Player
- Open VLC Media Player
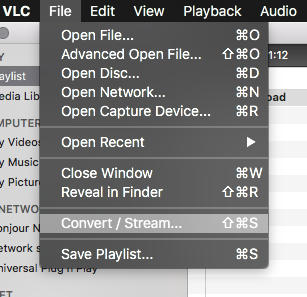
- Select File menu and then select Convert / Stream... menu item, the Convert / Stream window will open
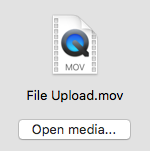
- Open Media... you wish to make smaller, by selecting your media using the platform's file picker
- Select Customize... from the profile area and the Profile Customise window will appear
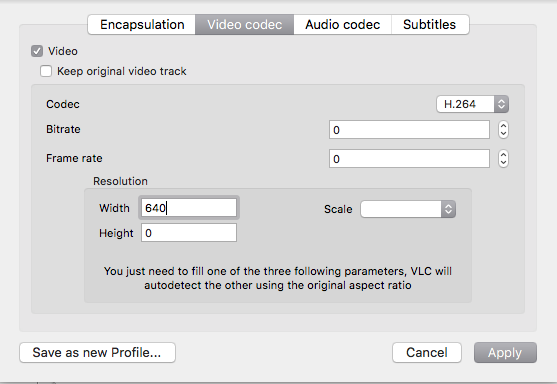
- Select Video codec tab and enter 640 into Width text input under Resolution heading
- Select Apply
- Choose Destination by selecting Browse... and then selecting a folder you wish the downsized video to be saved to using the platform's folder picker
- Select Save, folder picker window will close
- Select Save again to begin the compression process. The play bar becomes the progress bar for the task. Once the process is complete, try uploading the new smaller video into echoVideo Library.
6. Embedding echoVideo into Mylearn
Embedded videos can be placed into any online text editor within myLearn. This can include such activities (and not limited to):
- Forum posts
- Assignments
- Quizzes
You may have used echoVideo software, such as universal capture, or already have your video uploaded into echoVideo Library if so start at Step 2: Embed.
Written Instructions
- Upload media to echoVideo Library
- Embed and save
Step 1: Upload media to echoVideo Library:
In the editor, click on the Show More/Expand tool (the first tool) of the
Online Text Editor toolbar to expand the toolbars
![]()
Click on the echoVideo Embed tool on the second toolbar
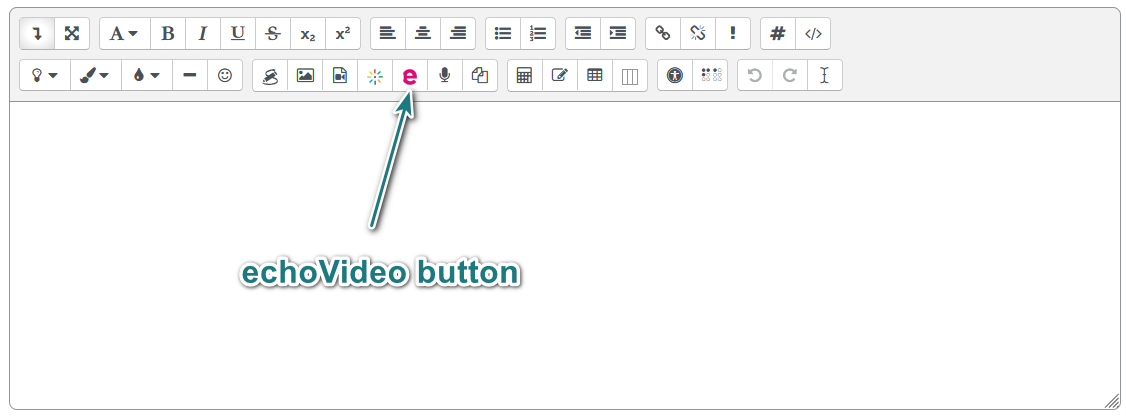
In the Embed Media popup, under "Upload Content" select Upload Media to upload your media to your Echo360 Library

Drag and Drop your file onto the upload panel -or-
click the add button ![]() to select the file from your device
to select the file from your device

Click the Upload button. When complete, return to the Embed Media section for Step 2.
Step 2 Embed:
You are now back in the Embed Media popup. Under Choose existing Content select Launch Media Picker

Select your video and click the Next button

On the Embed Options page of the popup, accept the defaults and click the Embed button

You now have an Embed Link in the Online Text Editor

Click the Save Changes button below the editor

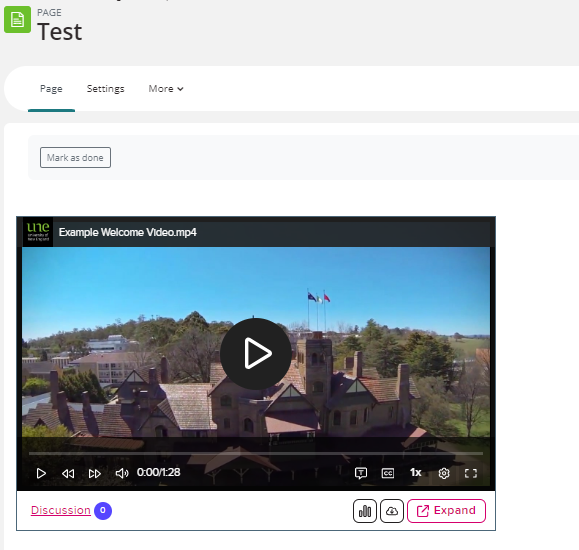
Once you have followed the steps, the video should display like this.
7. How to share a public link
You may be required by your Teacher to share a public link to your video. This request could arise if you are:
- Collaborating with your entire class or a group of learners.
- Needing to submit or share your work with individuals outside the university, such as prospective employers.
From your echoVideo Library
To create a link from your echoVideo Library
- Use the Filters and/or Search box to find the item you want to create a link for.
- Hover over the video and click the Menu button.
- Select Share from the media options menu, as shown in the below figure.
- The Individual tab appears by default. Click the Links tab in the side panel to open the Links creation screen.
The Links tab only lets you create new links, to see and manage existing links, open the Media Details Page. - Click the Create Link button.
- A new link is immediately generated, and has fields and configurable options as follows:
- Copy: Use the Copy button to copy the link URL for pasting into your desired location.
- Description: Enter a description for the link. This is useful for identifying the purpose of the link or the location to which it is to be posted. The description is for your purposes only and does not appear outside of EchoVideo.
- Start At: This allows you to set a 'starting location' for the media. Users can view the entirety of it, but by default, it begins playing at the location you set.
- Public access slider: When enabled (default), any person with the URL can view the media.
- When finished generating a link to the content, click Done at the bottom.
When you no longer need a public link to the media, open the Media Details Page to Delete that link. Deleting a link is permanent. Remember that you can deactivate a link by disabling the Active slider when you do not want to delete it. Deactivation retains the relationship between the link and the media but makes the media inaccessible via the link.
8. Sharing for collaboration
If your assessment may require you to collaborate with peers. If that is the case, please follow these instructions.
To share media from your echoVideo Library
- If necessary, click Library from the top navigation bar.
- Use the Filters and / or Search box to find the item you want to share (you can only share media you own).
- Hover over the media tile and click the Menu button.
- Select Share from the media options menu, as shown in the below figure.
The Share settings will appears with the Individuals tab active by default. This can have anywhere from one to four tabs, depending on how and where you can share the media.
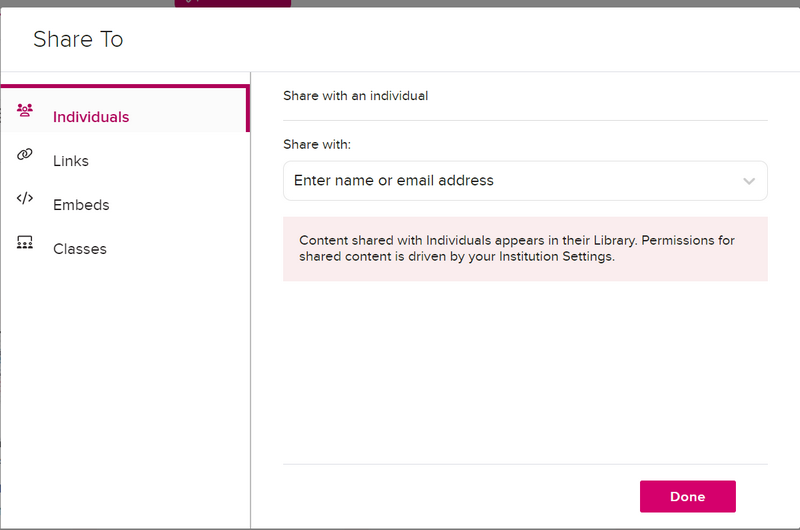
- Use the Share with drop-down list at the bottom of the modal to select a user to share the media with.
- Type directly into the textbox to filter the list based on the text provided. Continue typing or backspace as needed to find the user you want.
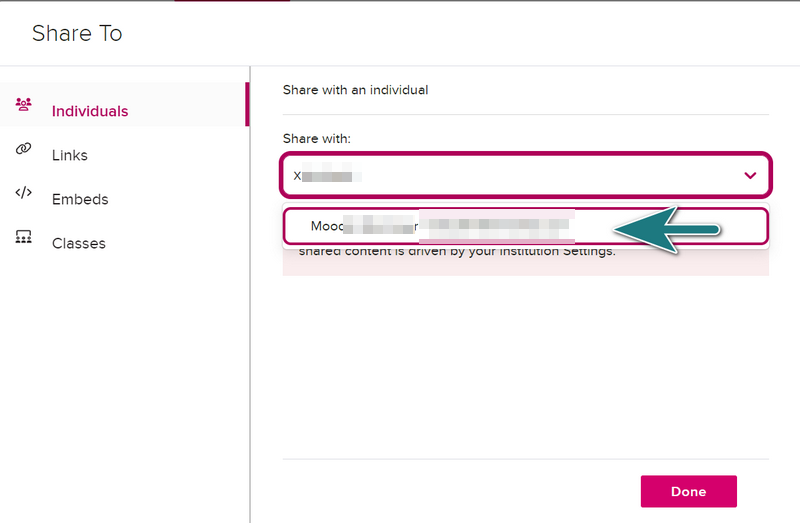
NOTE: The Search matches the FIRST portion of the text entered, though it can be the first part of the user's First name, Last name, or Email address.
- Select the matching user you want to share this media with. Once selected, the user appears in the Individual shares list, as shown in the below figure.
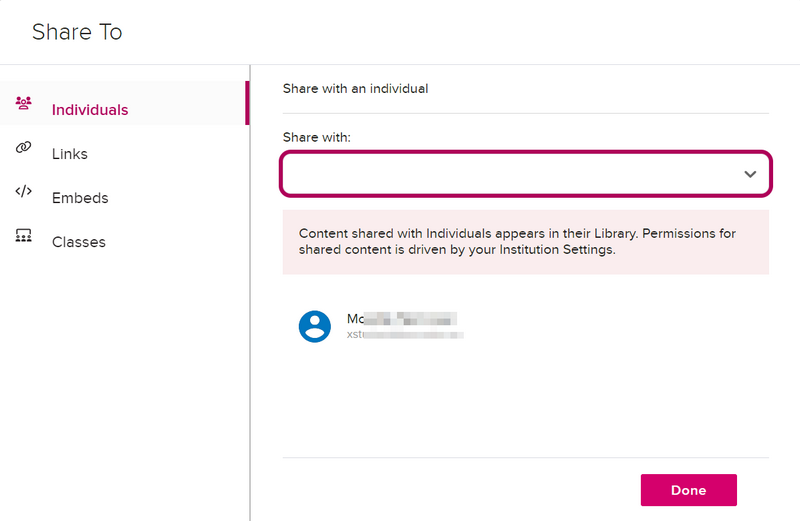
Repeat the above steps to share the item with additional users. Then click Done when finished.